
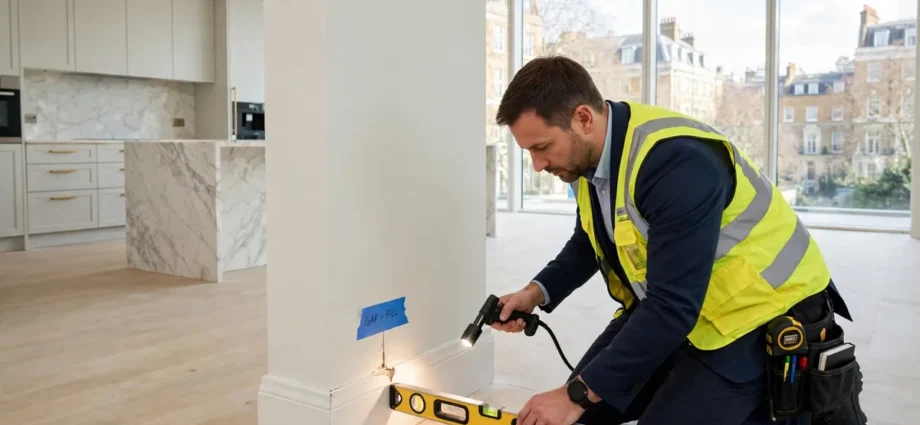
A buyer completes on a new two-bedroom apartment in a prime London development. The price is £2.4 million. The kitchen has a stone island, the bathrooms have book-matched marble, the joinery is bespoke, and the flat comes with a concierge, a gym and a residents’ lounge downstairs. On the first evening, the buyer notices a scratch across the hob, a door that will not close cleanly, a cold draught from a window, and a hairline crack running down the living room wall. None of these is a structural problem. All of them are defects the developer should fix, and all of them are much harder to get fixed after completion than before it.
That is what snagging is for. A snag is a defect in a new home: a scratch, a misalignment, a poor finish, a fitting that does not work as it should. A snagging inspection is a systematic check of the whole apartment, room by room, before the buyer accepts it, so that every defect is recorded in writing and the developer is asked to put it right. On an ordinary new-build, snagging is sensible. On a luxury new-build, where the buyer is paying a premium for the finish, it is essential, because the finish is a large part of what the price buys.
This guide is a snagging checklist written for a luxury new-build apartment in the UK. It covers when to inspect, what to bring, the tolerances a defect is judged against, a room-by-room list, the prime-spec finishes that generic checklists miss, the communal areas of the building, and how to report defects so they actually get fixed. It is general guidance, not a professional survey, and it does not replace the advice of the buyer’s solicitor or surveyor on the contract and the purchase.
In brief: Inspect the apartment before legal completion if the contract allows it, and report cosmetic damage within seven days of moving in. Bring a tape measure, a spirit level, a torch, a socket tester, a £1 coin as a gap gauge, a phone for photographs and blue tape to mark defects. Judge finishes against NHBC pass marks where they apply: chips and marks over 15mm should be fixed, door gaps of 4mm or less at the top and sides, walls no more than 3mm out over 2 metres, and cracks over 5mm reported. In the first two years the builder is responsible for defects; from years three to ten the warranty provider, for example NHBC Buildmark, covers structural and weatherproofing defects. A professional snagging inspection typically costs £300 to £500. On a luxury apartment, check the bespoke joinery, the stone, the appliance package and the smart-home controls as carefully as the walls and floors, and check the communal areas and the building services as well as the flat itself.
Why Snagging Matters More on a Luxury New-Build
A luxury new-build apartment is sold on its finish. The buyer is not only buying square footage and a postcode; they are buying stone worktops, bespoke joinery, premium appliances, underfloor heating, smart-home controls and a level of detailing that a standard development does not offer. When that finish is defective, the loss is not cosmetic in the ordinary sense. A scratched stone island cannot be touched up like a painted wall. A misaligned run of bespoke joinery cannot be fixed with filler. A smart-home system that does not respond reliably is not a minor fault; it is a failed part of the specification.
The scale of the problem on new-builds generally is large. Apartment-Checklist, a specialist snagging site, reports from its own figures that 94 per cent of buyers report problems after moving in, that only 34 per cent check beforehand, that the average defect list runs to 22 items, and that the average cost of putting those defects right yourself is £3,200. Those are that site’s own figures, not a verified national survey, and they cover ordinary new-builds, not luxury apartments. On a luxury apartment the cost of putting defects right yourself is higher, because the materials are more expensive and the trades are specialist. A replacement stone worktop, a re-sprayed appliance panel or a re-made joinery door costs far more than the equivalent repair in a standard flat.
There is a second reason snagging matters more at the luxury level. The buyer of a prime London apartment is often buying from overseas, or buying through a buying agent, and may never see the apartment in person before completion. The guide to buying agent fees in prime London explains how a buying agent works for the buyer through the purchase, and a snagging inspection is one of the points where that representation matters most, because the defects are in the flat and the buyer is not. Whether the buyer attends in person, sends an agent or hires a professional snagging inspector, somebody who knows what to look for has to walk the apartment before the buyer accepts it.
For the wider purchase context, see the guide to buying off-plan luxury property in London, and for the top of the market, what is super-prime property explains the price band this level of specification is sold into.
When to Snag: Timing Is the Leverage
The single most useful fact about snagging is that timing is the leverage. Before completion, the developer still wants the sale to go through, and a defect list presented at that point is a condition of acceptance. After completion, the buyer is asking the developer to return to a flat they have already been paid for. The law and the warranty still protect the buyer after completion, but the practical position is weaker, and the work is slower.
Where the contract allows it, the inspection should happen before legal completion. SnagAI and Apartment-Checklist, both specialist snagging sources checked in November 2026, agree on this point: inspect before completion if possible, and report cosmetic damage within seven days of moving in. Not every contract allows a pre-completion inspection, and the buyer’s solicitor should confirm what the contract says before the buyer assumes access. If a pre-completion inspection is not possible, the inspection should happen on the day of completion or the day after, before furniture arrives and before the buyer starts living in the flat, when every surface is still visible and every defect can be photographed cleanly.
A thorough inspection takes time. New-Builds.co.uk puts a typical inspection at two to four hours for a three-bedroom house, and longer for larger properties. A luxury apartment is smaller than a house, but the finish is more detailed, and the inspection should not be rushed. Allow at least two hours for a one-bedroom apartment and three to four hours for a two- or three-bedroom apartment with the full prime specification. Book the inspection in daylight if possible, because natural light shows defects in paint, plaster and stone that artificial light hides, and bring a torch for the corners and cupboards that daylight does not reach.
There is also a point of process to settle before the inspection. The buyer should know who the defects are reported to, in what form, and within what deadline. Some developers ask for a written snag list within a set number of days of completion. Some use a customer care portal. Some expect the list to go through the sales team. The buyer’s solicitor or the sales team should confirm the route in writing before the inspection, so the list goes to the right place and the clock starts from a recorded date.
What to Bring to the Inspection
A snagging inspection needs very little equipment, and the equipment is cheap. SnagAI and New-Builds.co.uk agree on the list, and it is worth assembling before the visit rather than improvising on the day.
Bring a tape measure, to check that rooms, worktops, appliance gaps and furniture spaces match the floor plan. Bring a spirit level, a 2 metre level for floors and walls and a 600mm level for worktops and shelves, to check that surfaces are level and that doors and windows sit square. Bring a torch, to rake light across walls and floors and to look inside cupboards, under sinks and behind appliances. Bring a socket tester, which costs about £10 to £15, to check every socket in the flat. Bring a £1 coin, which is 2.8mm thick and works as a quick gauge for gaps around doors and windows. Bring a phone, charged, for photographs of every defect, with the location noted. Bring blue tape or sticky dots, to mark each defect on the spot so the developer’s team can find it. Bring a printed copy of the floor plan and the specification, to check that what was promised is what was delivered.
Bring the specification, not just the floor plan. The specification is the document that says what the buyer is paying for: the brand and model of the appliances, the stone specified for the worktops, the finish on the joinery, the smart-home system, the sanitaryware, the flooring. A snagging inspection that checks the finish without checking the specification can miss the most expensive defect of all, which is that the wrong product was installed.
The Pass Marks: What Counts as a Defect
Not every mark is a defect. New homes are built to tolerances, and a finish that is within tolerance is not a snag, however much the buyer dislikes it. The most useful published tolerances for a UK new-build come from the NHBC Standards, Chapter 9, as reported by SnagAI in its snagging checklist. They are worth knowing before the inspection, because they stop arguments about whether a mark is worth reporting.
Chips and marks over 15mm should be fixed. A 5p coin is 18mm across, so a chip larger than a 5p coin is over the mark. Puddles on a floor or a balcony should be no deeper than 5mm and no bigger than one square metre, and there should be none at all by a door. Gaps at the top and sides of doors should be 4mm or less. Walls should be no more than 3mm out over a 2 metre run. Cracks over 5mm, and cracks that are diagonal, stepped or growing, should be reported. Stair and landing guarding should be at least 900mm high, balcony guarding at least 1100mm high, and no 100mm ball should pass through the gaps in the guarding, under Building Regulations Part K. The hot tap on a bath must not scald, and the limit is 48 degrees Celsius in new homes.
Two cautions belong with those figures. First, they are NHBC Standards as reported by SnagAI, and other warranty providers may set their tolerances slightly differently, so the buyer should check which warranty covers their apartment and what that warranty says. Second, the pass marks are a floor, not a ceiling. A luxury apartment is sold on a premium finish, and a buyer who has paid for book-matched marble and bespoke joinery is entitled to expect a finish that looks right, not only a finish that passes a minimum tolerance. A defect that is within tolerance but visibly wrong, for example a stone joint that is uneven or a joinery door that catches, should still be reported, and the developer should be asked to put it right.
The Room-by-Room Checklist
The inspection should be systematic, one room at a time, and it should follow the same order in every room: ceiling, walls, floor, windows and doors, then fittings, then services. The list below is the core of the checklist. It is not a 200-item generic list, and it does not try to be. The generic lists from SnagAI, Apartment-Checklist and New-Builds.co.uk run to 47 or 200 items, and they are useful references. The list here is the luxury apartment version: the same discipline, applied to the finishes and systems that a prime flat actually has.
Living Areas
Check the ceiling for cracks, stains and uneven plaster, and for light fittings that are level and secure. Check the walls for cracks, dents, uneven paint and visible joints, using the torch raked across the surface to show what flat light hides. Check the floor for scratches, chips, gaps between boards, hollow sounds underfoot and level, using the spirit level on the longest runs. Check the skirting boards for gaps, poor joints and paint splashes, and check that they sit tight to the wall and the floor. Check every window for smooth opening and closing, for draughts, for scratches on the glass, for condensation between panes, for locks that work and for handles that are secure. Check every internal door for gaps at the top and sides, for latching cleanly, for handles that are level and for hinges that are tight. Check every socket with the tester, and every light switch. Check the smart-home controls in the room, and confirm that the heating, lighting and blinds respond from the panel and from the app if one is provided.
The Kitchen
The kitchen is where the most expensive defects in a luxury apartment usually sit, because it concentrates the stone, the joinery and the appliances in one room. Check the worktops first: run a hand across every surface for chips, scratches and uneven joints, and check that stone joints are tight and that the pattern matches across the joint. Check the island, including the waterfall edge if there is one, for chips on the corners and for level. Check the cabinetry for doors that open and close cleanly, for soft-close hinges that work, for handles that are level and for gaps that are even. Check the splashback for cracks, for grout that is complete and for sealant that is neat. Check every appliance against the specification: brand, model, finish and position. Switch every appliance on. Run the oven, the hob, the extractor, the fridge, the freezer, the dishwasher and the wine cooler if there is one. Check the taps for flow and temperature, and check under the sink for leaks, for the waste and for the water shut-off. Check the flooring for scratches and for level, and check the ceiling for the extractor duct and for any staining.
Bathrooms
Check the tiles for cracks, chips, hollow sounds and grout that is complete, and check that the pattern is consistent across the room. Check the sanitaryware for chips, scratches and secure fixing, and check that the toilet flushes cleanly and that the cistern fills and stops. Check the shower for flow and temperature, for the tray or the wet room floor falling correctly to the drain, and for sealant that is complete around the tray, the bath and the basin. Check the bath taps for the 48 degree limit on hot water, and check that the bath itself is level and does not move. Check the mirrors, the lighting and the heated towel rail, and check the extractor fan. Check under every basin and behind every bath panel for leaks, and check the flooring for water damage at the edges. In a luxury bathroom, check the stone, the brassware and the joinery with the same care as the kitchen, because the same materials and the same cost are involved.
Bedrooms
Check the walls and ceiling as in the living areas, and check the floor for scratches, gaps and level. Check the windows for draughts, for smooth operation and for locks, and check the blackout blinds or curtains if they are part of the specification. Check the wardrobes and any fitted joinery: doors that close cleanly, drawers that run smoothly, handles that are level, and internal fittings that match the specification. Check every socket and light switch, and check the smart-home controls for heating and lighting in the room. Check the en suite bathroom against the bathroom list above, and check the dressing area if there is one.
Hallway, Utility and Storage
Check the hallway walls and floor, the front door and its locks, the video entry system and the post box if there is one. Check the utility area for the washing machine and dryer, for the plumbing connections, for the waste and for ventilation. Check every cupboard and storage space for shelving that is level and secure, for doors that close, and for the consumer unit, the water shut-off and the heating controls. Check the hot water cylinder or the boiler cupboard, if there is one, for leaks, for labelling and for access.
Windows, Doors and Balconies
Check every window in the flat in one pass, because windows are a common source of defects and a common source of dispute. Open and close each one fully, check the locks, check the seals, check for scratches on the glass and for condensation between the panes, and check for draughts with a hand around the frame. Check the balcony doors and the balcony itself: the floor for level and drainage, the guarding for height and for gaps, the doors for smooth operation and for seals. Check that there is no ponding on the balcony and no water by the door, against the pass mark above.
The Prime-Spec Items Generic Checklists Miss
Generic snagging checklists are written for ordinary new-builds, and they miss the items that make a luxury apartment luxury. The buyer of a prime flat should check these as carefully as the walls and floors.
Bespoke joinery is the first. Check every run of joinery for doors that are level and gaps that are even, for handles that are aligned, for soft-close mechanisms that work, and for finishes that match across the run. Check that the joinery specified is the joinery installed, and that the internal fittings, the drawers, the shelving and the lighting, match the specification.
Stone is the second. Check every stone surface, worktop, splashback, bathroom vanity and window sill, for chips, scratches, staining and uneven joints. Check that the stone matches across joints and that the finish is consistent. Stone is expensive to replace and difficult to repair invisibly, so a chip on a stone island is a defect worth reporting promptly, even if it looks small.
The appliance package is the third. Check that every appliance is the brand and model in the specification, that it is correctly installed, and that it works. Check the integrated appliances for panels that are level and for doors that close flush with the cabinetry. Check the wine cooler, the coffee machine, the warming drawer and any other premium appliance the specification includes, because those are the items most often substituted or left untested.
The smart-home system is the fourth. Check that the heating, the lighting, the blinds, the audio and the entry system all respond from the wall panels and from the app, and that the system is set up for the buyer, not left on a developer default. Check that every room has the controls the specification promises, and that the heating zones work independently. A smart-home system that is half configured is a defect, not a teething problem.
The mechanical and electrical services are the fifth. Check the underfloor heating in every zone, check the ventilation and the air conditioning if there is any, check the water pressure at every tap and shower, and check the consumer unit, the labelling and the certificates. Check that the heating controls are explained and that the manuals for the appliances and the systems are handed over with the flat.
Communal Areas and Building Services
A luxury apartment is not only the flat. The buyer is also buying into a building, and the building’s communal areas and services are part of the purchase. The snagging inspection should include them, because defects there affect the value of the flat and the service charge that pays for them.
Check the entrance lobby, the corridors, the lift lobbies and the stairwells for the same finishes as the flat: walls, floors, lighting and doors. Check the lift for smooth operation and for the finish inside the car. Check the residents’ lounge, the gym, the pool or spa if there is one, and any other amenity, for finishes, for equipment that works and for the specification. Check the concierge desk, the parcel room and the post room. Check the car park, the cycle store and the bin store for lighting, for drainage and for access. Check the external areas: the entrance, the landscaping, the paving and the lighting.
Check the building services that the buyer will rely on. Ask for the documents that should be handed over with the flat: the warranty policy or certificate, the energy performance certificate, and the building control completion certificate. Those are the documents SnagAI lists as the ones to chase in writing, and they should be in the buyer’s hands at completion. Check that the service charge, the ground rent and the reserve fund are as the contract states, because the running costs of a luxury flat are substantial, and the guide to ground rent on luxury London flats sets out what prime buyers must check on that charge.
How to Report Defects and Get Them Fixed
A snag list is only useful if it is reported properly and followed up. The process is straightforward, and the discipline is in writing everything down.
Photograph every defect, with the location noted, and mark it with blue tape on the spot. Write the list in a clear format, room by room, with the defect, the location and the photograph number for each item. Send the list in writing to the route the developer confirmed before the inspection, and keep a copy with the date it was sent. Ask for a written acknowledgement and a date by which the defects will be put right. Keep every email, every letter and every photograph, because the record is the buyer’s protection if a defect is disputed later.
Understand who is responsible, and for how long. In the first two years after completion, the builder is responsible for defects, and the buyer should report them to the builder. From years three to ten, the warranty provider, for example NHBC Buildmark, covers defects that affect the structure and the weatherproofing of the home. Cosmetic defects reported after the first two years are much harder to get fixed, which is why the first inspection and the seven-day window for cosmetic damage matter so much.
Be clear about what snagging cannot do. It cannot fix a defect that is within tolerance and visibly acceptable. It cannot change the specification the buyer agreed to. It cannot make a developer rebuild a flat that is built as specified. And it is not a survey: it does not assess the structure, the value or the legal title of the property. If the inspection reveals something that looks structural, a crack that is diagonal, stepped or growing, or a floor that is significantly out of level, the buyer should get a surveyor’s advice before completion, not after it.
There is also a point about the contract that the buyer’s solicitor should advise on, and this guide does not give legal advice on it. Retention, completion notices, the defects liability period and the New Homes Quality Code or the Consumer Code for Home Builders all affect what the buyer can require and when. The buyer should check the contract and ask their conveyancer what applies to their purchase, rather than assuming that snagging alone creates a right to withhold completion.
Doing It Yourself or Hiring a Professional
A buyer can snag their own apartment, and many do. The equipment is cheap, the pass marks are published, and the checklist in this guide covers the rooms and the prime-spec items. A buyer who is methodical, who allows enough time and who photographs everything can produce a good snag list.
A professional snagging inspector brings three things a buyer usually does not. The first is experience: an inspector who has checked hundreds of new-builds knows where defects hide and what a developer will dispute. The second is equipment: thermal imaging cameras and damp meters that show defects invisible to the eye, for example cold bridging, missing insulation and damp behind a wall. The third is a formal report, in a format developers take seriously, which is harder to dismiss than a buyer’s own list.
The cost is modest against the price of a luxury apartment. New-Builds.co.uk puts a typical professional inspection at £300 to £500, and Apartment-Checklist gives an example of £300 for a professional check that found 38 defects. Against a £2 million purchase, £300 to £500 is a small sum for a report that can save thousands in repairs. A buyer who is overseas, who cannot attend in person, or who is buying a flat with a complex specification should seriously consider a professional inspection, and should ask the inspector whether they have experience with prime London developments and with the warranty provider covering the building.
Whether the inspection is done by the buyer or by a professional, the same rule applies: do it before completion if the contract allows, report in writing, keep the record, and follow up until the defects are fixed.
Frequently Asked Questions
What is snagging on a new-build apartment?
Snagging is a systematic inspection of a new home, room by room, to find defects in the finish and the fittings, and to record them in writing so the developer puts them right. A snag is any defect: a scratch, a misalignment, a poor finish, or a fitting that does not work as specified.
When should I snag a luxury new-build apartment?
Before legal completion if the contract allows it, because that is when the buyer has the most leverage. If a pre-completion inspection is not possible, inspect on the day of completion or the day after, before furniture arrives. Report cosmetic damage within seven days of moving in.
How long does a snagging inspection take?
Allow at least two hours for a one-bedroom apartment and three to four hours for a two- or three-bedroom apartment with a full prime specification. A thorough inspection of a typical three-bedroom house takes two to four hours, according to New-Builds.co.uk, and a luxury apartment needs the same care because the finish is more detailed.
What should I bring to a snagging inspection?
A tape measure, a spirit level, a torch, a socket tester costing about £10 to £15, a £1 coin as a 2.8mm gap gauge, a phone for photographs, blue tape or sticky dots to mark defects, and a printed copy of the floor plan and the specification.
What are the NHBC pass marks for snagging?
As reported by SnagAI from NHBC Standards Chapter 9: chips and marks over 15mm should be fixed; puddles no deeper than 5mm or bigger than one square metre, and none at all by a door; door gaps of 4mm or less at the top and sides; walls no more than 3mm out over 2 metres; cracks over 5mm, and diagonal, stepped or growing cracks, should be reported; stair and landing guarding at least 900mm, balcony guarding at least 1100mm; and bath hot water limited to 48 degrees Celsius. Other warranty providers may differ slightly.
Who fixes the defects, and for how long?
In the first two years after completion the builder is responsible for defects. From years three to ten the warranty provider, for example NHBC Buildmark, covers defects affecting the structure and the weatherproofing of the home. Cosmetic defects are hardest to get fixed after the first two years, so report them promptly.
How much does a professional snagging inspection cost?
Typically £300 to £500, according to New-Builds.co.uk, with Apartment-Checklist giving an example of £300 for a professional check that found 38 defects. Against the price of a luxury apartment, that is a small sum for a formal report the developer takes seriously.
What does snagging not cover?
Snagging does not assess the structure, the value or the legal title of the property, and it is not a survey. It does not fix defects that are within tolerance and visibly acceptable, and it does not change the specification the buyer agreed to. If the inspection reveals something that looks structural, get a surveyor’s advice before completion.
Do I need to snag the communal areas as well?
Yes. Check the entrance lobby, corridors, lift lobbies, residents’ lounge, gym, pool or spa if there is one, the concierge area, the car park, the cycle store, the bin store and the external areas. Defects there affect the value of the flat and the service charge that pays for them.
Is this guide a professional survey or legal advice?
No. This guide is general information about snagging a luxury new-build apartment in the UK as of November 2026. It is not a survey and it is not legal, financial or valuation advice. Check the contract and ask the conveyancer what applies to the purchase, and get a surveyor’s advice if the inspection reveals anything that looks structural.
This guide is general information about snagging a luxury new-build apartment in the UK as of November 2026. It is not a professional survey and it is not legal, financial, tax or valuation advice. NHBC pass marks are NHBC Standards Chapter 9 as reported by SnagAI; other warranty providers may differ slightly. Figures attributed to Apartment-Checklist are that site’s own figures, not a verified national survey. Check the contract and ask the conveyancer what applies to the purchase, and get a surveyor’s advice if the inspection reveals anything that looks structural.